Pilot safety and SIV training course – David Eyraud

MEMO
Full stall and back fly
During the transition:
1- Release the brake handles and simulate the gestures according to the chosen entry technique. Find reference points, practice holding on, with muscle tension!
2- Check the brake travel (security margin) according to the chosen brake grip and practice making secured “hands up”.
If we have chosen a grip that’s too short = with an extra brake wrap (which doesn’t allow the trailing edge to be fully released, with raised pulley, when maintaining this brake wrap) open the box below
Brake 25 cm and maintain this amount of brake (this pressure in the brake line)… Make the brake wrap without braking more… Undo the brake wrap without releasing the pressure in the line. Do this exercise several times, slowly at first and increasingly faster, without creating any pitching movement.With extra brake wrap: click here
Preparation:
Switch to active piloting mode and safety position: seated, legs bent and spread apart.
Expect to get shaken up. You need to brace yourself: use muscle tension!
Entry techniques:
There are several techniques to induce the stall. Click on the link to go directly to the chosen technique.
A – The “classic” or “one-stage” entry
C – The “asymmetric” entry (through spin)
D – Entry from a pitching movement, at the top of the climb (one-stage or two-stage)
A – The “classic” or “one-stage” entry
Slow down gradually (about 40 cm), without inducing any pitching movement.
Maintain this amount of brake for about two seconds to be well stabilized.
Look far ahead. Brace yourself.
Raise your elbows and quickly bring your hands down completely under your buttocks, arms straight, elbows locked, along the harness (without unhooking your reserve handle).
The wing pendulates backwards suddenly! Keep your legs bent!
Risk of very dangerous surge with pilot falling into the wing!
Then the pilot feels like “falling” backwards: maintain arms straight and locked along the body!
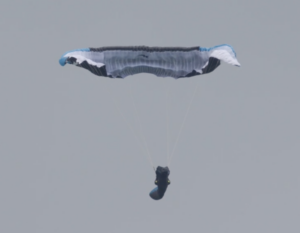
Examples of “classic” entries:
When the pilot arrives under the wing, and when David requests it, start reconstructing the wing…
Slow down gradually (about 40 cm), without inducing any pitching movement.
Maintain this amount of brake for about two seconds to be well stabilized.
Brace yourself. Look at the wing. Raise your elbows and quickly bring your hands down until the wing stalls:
- The wing distorts (wingtips move back but not too much!)
- The wing deflates
- The brake pressure softens

The wing must not distort more than shown in the image above!
Immediately raise your hands quickly and completely so that the wing “un-distorts”.

Immediately bring your hands back down quickly and deeply to the position defined with David: if this is your first stall, it’s recommended to bring your hands completely down under your buttocks, arms straight, elbows locked.

The wing tips back: keep your legs bent!
Risk of very dangerous surge with pilot falling into the wing!
Then the pilot feels like “falling” backwards: maintain hands low.
If we chose to bring hands completely down, keep arms straight and locked along the body!
If we chose to bring hands to a position closer to the carabiners, the wing might show a surge movement.
There are 3 scenarios:
- The wing stabilizes in back fly (more or less clean)…
- The wing positions itself in “exit door” (see below)…
- The wing shows a surge that needs to be caught. If David calls “CATCH!”: brake strongly!
Example with a high aspect ratio wing:
Examples with lower aspect ratio wings:
When the pilot arrives under the wing, and when David requests it, start reconstructing the wing…
Slow down gradually (about 40 cm), without inducing any pitching movement.
Maintain this amount of brake for about two seconds to be well stabilized.
Brace yourself. Look at the wing on the spin side (= inside). Stay neutral in the harness and keep your legs bent!
Quickly bring the inside hand completely down while raising the outside hand (hands up).
The wing starts to turn…
When the trailing edge closes (inside), meaning after about 1/4 to 1/2 turn maximum, place both hands at the position defined with David:
- either both hands down, under your buttocks, arms straight, elbows locked and against the harness (be careful not to unhook your reserve handle).
In this case, simply bring the outside hand down while keeping the inside hand down.
- or at a higher position, for example:
- 20 cm below the carabiners,
- at the carabiners
- if you already know your best back fly compromise, you can go directly to this position.
In this case, the outside hand goes down while the inside hand comes up.
The wing stops turning.
Examples of asymmetrical entries :
When David requests it, start reconstructing the wing…
Brace yourself. Stay neutral in the harness and keep your legs bent!
From stabilized flight, hands up, perform two pitching movements:
Brake for the first time to create the first climb. At the top of the climb, quickly release the brakes to let the wing surge.
Keep hands up during the surge and acceleration phase…
When the pilot arrives vertically under the wing (at zero point):
Brake progressively until below the carabiners…
Then raise your elbows and bring your hands down very quickly and completely under your buttocks, arms straight, elbows locked, along the harness (without unhooking your reserve handle).
When the wing stalls, follow the planned entry technique:
A – The “classic” entry
B – The “two-stage” entry
Keep hands low enough during the pendular swing (pilot swings backwards towards the wing).
Examples of entries at the top of the climb :
When the pilot arrives under the wing, and when David requests it, start reconstructing the wing…
Brace yourself. Stay neutral in the harness and keep your legs bent!
Hold your brake handles in a way that allows you to transition to back fly in a single movement.
Grab the B risers high up (above the pulleys).
Look at the wing.
Pull symmetrically on the B risers until the wing stalls. And hold.
The wing goes slightly backwards:
- Either go directly to back fly.
- Or hold to stabilize a B-line deep stall.
To transition to back fly:
Release the B’s and simultaneously bring your hands down quickly to find your back fly with the amount of brake defined with David:
- If you don’t yet know your best compromise: hands very low, with muscle tension to control your movements!
- If you know your best compromise: go directly to back fly position.
Examples of B stall entries:
When the pilot arrives and stays under the wing, and when David requests it, start reconstructing the wing…
Reconstruction
When David requests it, look at the wing, and start reconstruction (bringing hands up) according to the chosen technique (depending on the wing, brake travel and brake grip).
You need muscle tension to control your movements: keep your legs bent, arm muscles well braced!
David will give directions “20 cm higher… 2 cm more up… don’t move… lower…”.
Try to do what David asks without taking too much initiative (David assumes you’re doing what he asks).

Look at the wing’s shape but without leaning backwards (lift your eyes). From time to time remember to look ahead at the horizon.
If possible, don’t hesitate to hold on (harness strap, carabiners, bottom of risers…).
Exit door?
During this reconstruction phase (or searching for back fly), the wing may make a forward pitching movement (a kind of surge controlled by braking). It wants to fly and positions itself in “exit door”.
The door is the boundary at the end of the surge movement and not the surge itself.
We talk about a door when the wing is at least 30° forward.
David will indicate “door” at the moment of the door.
If you haven’t seen this door coming, do nothing: the wing should swing backwards again…
If you have seen this forward movement of the wing, it’s possible to “take the door” by releasing the brakes quickly at the exact moment of the door.
- If you release the brakes too early, it might amplify the surge (the wing might collapse).
- If you release the brakes too late, the wing goes backwards again: it’s a dynamic stall! You need to bring your hands down to re-stabilize the back fly!
Voluntary Exit
From a back fly, with the wing vertical above the pilot, to exit, simply release the brakes quickly: “hands up!”
The following surge is very dynamic but the wing should not collapse.
For your first exit, it’s not necessary to catch.
For subsequent exits, or for high aspect ratio wings, a good surge catch reduces the risk of cravat.
The surge catch
If the wing is vertical above the pilot when initiating the exit, it’s an aerodynamic surge: very dynamic and with amplitude up to 90° but not dangerous.
This surge is very short in duration.
Let the wing regain its speed and reinflate: wait until the wing is between 30° and 40° before catching.
The catch is a kind of “brake input” meaning a gesture that is:
- Very fast!
- Between 50 and 80 cm in amplitude.
- Very brief: not maintained!
- Released very quickly and completely…
- Start braking when the wing passes vertical.
- Brake with maximum morphological amplitude: arms straight, hands back!
- Maintain braking until the end of the surge!
Managing cravats
The risk of cravat is quite high when exiting back fly. The higher your wing’s aspect ratio, the higher this risk.
A good catch reduces the risk of cravat.
If there is a single cravat
With a cravat on one side, the wing can quickly go into rotation. Even a small cravat!
Counter (with weight shift and brake) before the rotation starts: heading is priority!
If the wing turns: counter to stop the rotation and regain the correct heading.
As long as it’s turning, you need to counter more, even if it means stalling.
Once on the correct heading, reopen the cravat:
- Stabilo line for very small wingtip cravats.
- Asymmetric stall.
- Wingtip closure (big ears) in case of line over.
If there are two cravats
With two cravats, the wing is very sensitive to stall.
If possible, you should avoid countering with command before performing the asymmetric stall. The brake counter is probably not necessary.
Uncravat one side first, then the other.
If it stalls, the best is to stabilize in back fly.
